

If you’re like most people, the center console in your car is a bit of a mystery. What is it for? What does it do? Why would you want to remove it? In this blog post, we will answer all of those questions and more! We’ll start by describing what the center console is and why you might want to remove it. Then, we’ll give you a step-by-step guide on how to do it. Finally, we’ll provide some tips on how to put the center console back together in your car.
Let’s take a look!
What Is The Center Console Of A Car?
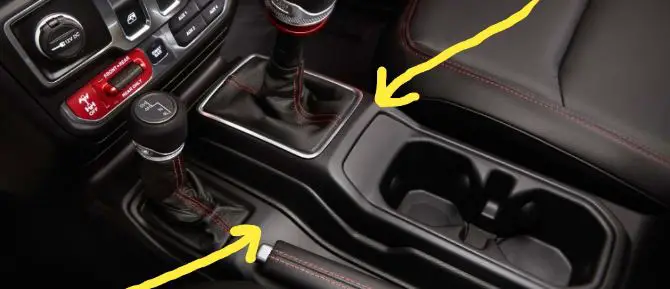
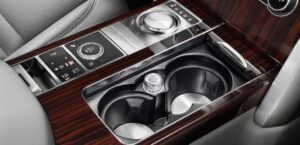
The center console of a car is located between the driver and passenger seats. It provides storage compartments for items such as phones, wallets and other small personal items. Additionally, it often houses important controls for the vehicle’s audio system, climate control levers and navigation system if equipped. In some vehicles, it even contains an armrest, cup holders and accessory chargers.
Having all these features conveniently in one location allows drivers to keep their attention on the road while adjusting different settings with minimal distraction. On some models, this centralized area also includes gear shifters that allow you to select options like ‘Park’, ‘Reverse‘ or ‘Neutral’. Modern cars may also have a touchscreen display right at the center console which allows access to all the features of the car.
Overall, the center console is an essential part of any vehicle, providing convenience and a sense of organization in your everyday drive.
Why Would You Need To Remove The Center Console?
Sometimes your center console may need to be removed in order to perform repairs or maintenance. For example, if you need access to the vehicle’s wiring system or components located beneath the center console, it will have to be taken out. Additionally, you may want to replace certain parts of the center console with more advanced ones such as screens for improved tech-functionality and styling.
In any case, removing a car’s center console isn’t an easy job since there are quite a few things that need to be disconnected and unscrewed before it can come off. That said, if done correctly, anyone can remove their car’s center console without any professional help or damage to their vehicle.
What Tools Are Recommended For Removing A Center Console?
When removing any part of a car, it’s important to have the right tools for the job. Here are some basic tools you’ll need to remove the center console in your car:
– Screwdriver
– Pliers or needle nose pliers
– Socket and ratchet set
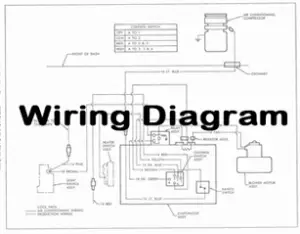
– Wiring diagram (optional)
How To Remove The Center Console Of A Car Step By Step
Now that you know what the center console is and why you might need to remove it, let’s take a look at how to do this step by step. Before starting, make sure that your vehicle is parked on a flat surface and turn off the engine.
The center console of a car can be tricky to remove if you don’t know what you are doing. It is important to proceed with caution so that no damage is done to the interior while removing it.
1. Start by disconnecting any electrical components connected to the center console. This includes the audio system, climate control levers and navigation systems if applicable. Be sure to consult your vehicle’s wiring diagram before unplugging any connections.
2. Remove any screws or bolts holding the center console in place. Use the right size socket or screwdriver for each bolt and take note of where they go as you will need them again when reinstalling the part later on.
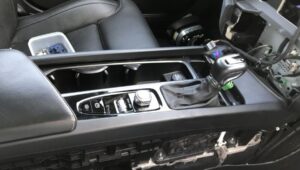
3. Once all the screws are removed, carefully pull out the center console from its housing in your car’s interior. Keep an eye out for any cables or wires that may be attached to it so that you can disconnect them properly without damaging anything.
4. Once everything is disconnected, lift up the center console carefully and move it to a flat, secure surface.
How Long Does It Take To Remove A Center Console?
Removing a center console generally takes around 30 minutes to an hour depending on the make and model of your vehicle. It is important to take your time and follow the steps properly in order to avoid any damage or unnecessary delays in the process.
How To Reinstall A Center Console
If you have successfully removed the center console from your car, then you may want to reinstall it. Here are some tips for putting the center console back together:
1. Start by connecting any electrical components that were disconnected earlier. Make sure that each connection is secure and correct.
2. Place the center console in its housing and make sure that all its edges are aligned properly with the surrounding area of your car’s interior.
3. Screw in all bolts and screws securely but not too tightly so as not to damage any parts of your vehicle’s interior or the center console itself.
4. Double-check that everything is connected correctly before turning on the engine and taking your car for a spin.
Tips And Tricks For Performing This Job
Here are some additional tips and tricks to keep in mind while removing or reinstalling a car’s center console:
– Make sure that you have the correct tools for the job. It is important to have the right size socket or screwdriver for each bolt and nut.
– Consult your vehicle’s wiring diagram before unplugging any connections as this will help ensure that everything is reconnected properly when reinstalling the part.
– Take your time and be patient while performing this task so that no damage is done to your vehicle’s interior or yourself.
Conclusion
Removing a car’s center console isn’t an easy job, but if done correctly, anyone can do it without professional help. Make sure to have the right tools and follow the steps carefully so that no damage is done in the process. And finally, don’t forget to consult your car’s wiring diagram before unplugging any connections!
Good luck with removing your car’s center console!