

Every car owner knows how nasty oxidation can be. However, the metal parts and contacts are not the only possible victims of this process. It might already be happening to your headlights right now as you read this article.
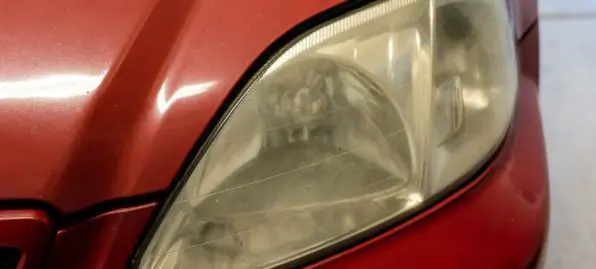
Just like rust eats away at the metal, oxidation deteriorates acrylic lenses making them less transparent. It looks like foggy plastic with a white or yellow hue. But aesthetics is not the only problem that arises from headlight oxidation.
Sometimes it happens due to faulty wiring or improper installation. Sometimes it is because your bulbs are nearing the end of their service life. In that case, you can visit any auto bulbs guide to find a replacement. But replacing an entire assembly because of some foggy lenses can be very expensive. So, here we are going to look closer at some ways to restore your lenses and prevent oxidation in the future.
What Causes Headlights Oxidation
Originally, headlights are made with a special protective layer on the lenses. It deteriorates slowly and gradually, exposing the lens to the elements. There are a few factors that speed up this process. For instance, dust and small debris constantly bombard the surface and sometimes leave tiny scratches. Even the light itself affects the opacity as the UV rays come in contact with the plastic and prompt oxidation.
Another rare case of oxidation happens on the inside of the headlight assembly. The light from the bulb can, under certain circumstances, cause fogginess too. Old headlights are most prone to this kind of deterioration. They are more likely to have tiny cracks and sealing issues that let moisture inside. The risk increases if you use bulbs that have high burning temperatures like halogens or HIDs. They heat the plastic lenses and damage the plastic, however, it happens very slowly.
Other factors like harsh chemicals on the road during winter and bad weather also contribute to faster oxidation. “It is always a good idea to clean the slush off the headlights,” says Ben Collins, the content editor of the LightningLab project. “And you should do it outside before it melts in the garage or indoor parking. It is more aggressive when it warms up.”

How to Remove Oxidation
The deteriorated layer has to go. It’s “dead”. So usually, restoration starts with a good cleaning and proceeds to the gentle removal of the foggy crust on the surface. When the oxidation is not too bad, a simple deoxidizer can be a good solution. Just follow the instructions to a T, and your headlights will be grateful. It is both the laziest and the most gentle way to fight oxidation.
Unfortunately, gentle means can only help with mild fogginess. For heavy oxidation, you will have to use abrasive treatment with special restoration products, sandpaper or DIY methods. This additional step will help remove the layer affected by oxidation and reveal clear plastic underneath.
Both approaches will leave your headlights bare and vulnerable to harsh conditions. Ideally, the last step must include a special coating that will protect the acrylic lens from UV radiation, pollution and moisture. It can be a special product formulated for headlights, car wax, or thin protective film.
Can Toothpaste Actually Restore Headlights?
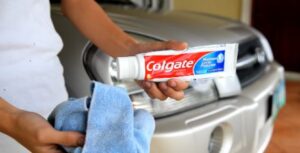
If you have ever browsed for a way to remove oxidation or just polish your headlights as a preventive measure, you have definitely seen this DIY method. Toothpaste seams harmless enough, we use it every day, hopefully, and it doesn’t do any harm. Luckily, it is also true for your headlight lenses.
Toothpaste contains very small abrasive parts that work as a gentle polishing product. It literally does the same for our teeth. It takes around ten minutes to scrub the oxidized layer off with a cloth, some toothpaste and water. It all depends on how bad your case is.
Do DIY Defogging Methods Work?
A mixture of baking soda and vinegar or lemon juice will also work in a similar way. The same goes for Magic Eraser and even Coke. However, toothpaste, homemade concoctions and other popular DIY methods will be ineffective when oxidation turns lenses yellow or brown. It indicates rather heavy oxidation that requires something more potent.
This technique will also be ineffective if the oxidation is caused by scratches and cracks due to wear. In that case, you can use toothpaste to clean the lens before the actual treatment. It will remove dirt and remnants of wax.
Will WD-40 Ruin Headlights?
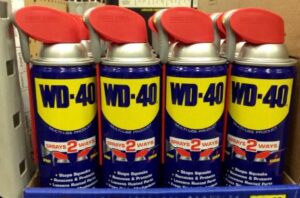
We all love quick solutions and the WD-40 is one of them. It makes the lenses look almost perfectly clear immediately. All you need to do is protect the seams with tape to prevent the product from doing any damage inside the car and spray WD-40 on a clean cloth. Then rub in the product until you are satisfied with the result and carefully wipe it off with a clean cloth or flip the cloth over to the side that is not soaked in WD-40.
It is a quick fix that works instantly but works for a few weeks if you are lucky enough and the weather is forgiving. WD-40 is a gamble if you intend to use it as a main defogging method. It can get inside the light assembly and cause a headlight bulb burnout. So it is not recommended to use it often.
It works as an emergency measure. Using it every few weeks to maintain light output is tedious, ineffective and can cause more harm than good.
How to Prevent Oxidation
Preventing something is always easier than dealing with consequences. As for oxidation issues, you can prevent this nuisance with timely car care. Regular washing and polishing will remove dirt and even out the surface, keeping the lens transparent for a long time. But that alone can only partially help.
As the original protective coating wears off, replace it with different products that work best for you. It can be car wax, hydrophobic sprays and headlight films. Just don’t forget that they also require cleaning and replacing from time to time.
Written by Charles Farrell