
You might have thought you’d always be able to go through life not caring about anything with “pan” in the name, but the engine oil pan is an exception. This simple but crucial part of your car’s oil system is key in keeping your engine running and oil flowing. In today’s blog, we’re taking a closer look at the engine oil pan, what it does, how it works and how to detect if your own engine oil pan is in need of maintenance.
What is an Engine Oil Pan?
If so far you’re wondering what on earth the engine oil pan is, you might have heard it called by another name, “sump.” Both are correct but it’s good to be aware of both. In the mighty metal block that is your engine, you have to traverse all the way to the bottom of the structure to find the oil pan. It’s an attachment that covers the bottom of the engine and acts as the reservoir for your engine oil.
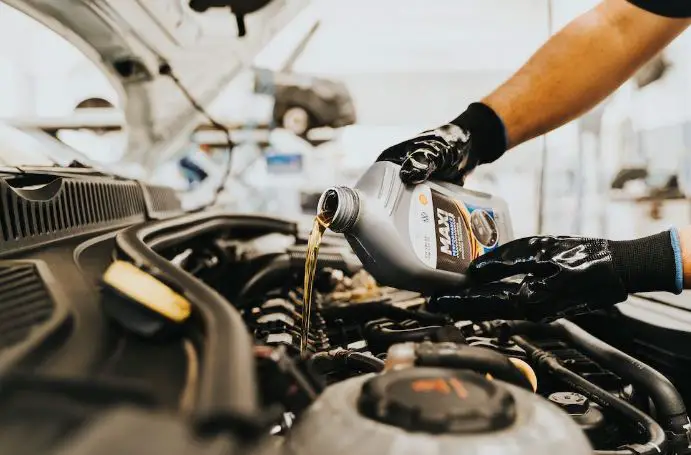
Oil in the pan is pumped from there to the many parts where it is needed as a lubricant and coolant within the engine as it runs. A pump is attached to the oil pan that moves the oil outward and back toward the pan, and filters to catch all the nasty debris that collects along the way. When the contaminants get too much, that’s when it’s time to open up the oil pan from below, drain it of the oil, remove and replace the filter and then put in fresh oil.
How Does the Engine Oil Pan Work?
As we described above, the main mechanism through which the engine oil pan works is the pumping and filter system that removes oil from the pan’s reservoir and takes it to various parts of the engine that need it. It then comes back into the pan via a filter where it can then be circulated again and again as needed. As long as the engine pan is not damaged or leaking, and as long as the filter is still working, then it will continue to do so in its role as an oil reservoir/storage.
Symptoms of a Bad Engine Oil Pan
Look out for any of the following signs that your oil pan might be damaged or in need of replacement.
-
Oil Puddles
Have you noticed oil puddles on your driveway or in your garage? You might not notice them when you get in your car and drive off because you’re not looking out for it. Someone else at home might spot them after you’ve gone, or if your car has high enough clearance you can just bend down to take a look. As you might expect, oil puddles are a dangerous sign that your oil pan is leaking.
A leaking oil pan is serious because it’s essentially akin to humans bleeding out. Oil is the lifeblood of the engine, and can’t be left leaking. It needs to be fixed, or the pan replaced ASAP. If you can get under the car to look, it can be useful to know if the leak is coming from a hole or crack in the pan structure, or if it’s coming from the drain plug. That’s the part you remove during an oil and filter change to allow the old oil to drain out.
The plug should be completely sealed, of course, but if the leak is coming from there then it could mean a number of things. It could be repairable, but if the inner crush gasket has failed then the entire pan will need to be replaced.

-
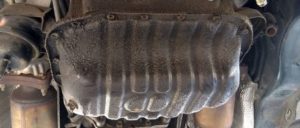
You Can See Damage on the Oil Pan
If you take a look at the oil pan and discover that there is serious physical damage like denting or other impacts, then it likely needs to be replaced. Such damage can compromise the physical integrity of the pan, making it unsafe and more susceptible to leaks.
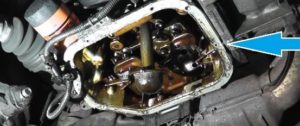
How to Replace an Engine Oil Pan
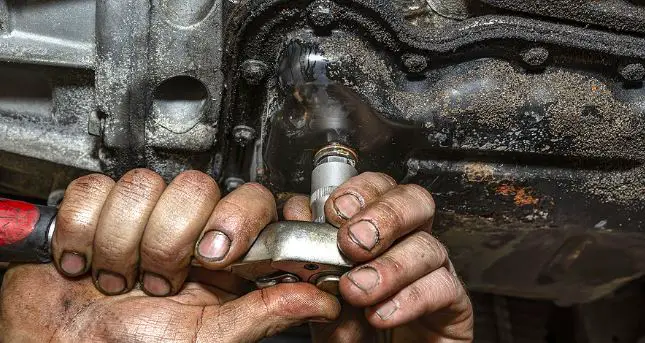
Oil pan replacement is a mercifully straightforward process. Those with a bit of car know-how can likely tackle it by themselves, but of course it’s also easy to seek out a professional to help (see below for more). For the following procedure, we’ll explain how to refit an existing oil pan. If you are doing an oil pan replacement with a brand-new oil pan, then you can skip steps 4 and 5. You’ll only need basic tools, and nothing particularly special or unique: an oil drain pan, wrench or spanner for bolt removal, a chisel for removing gasket parts,
Step 1: Drain the Oil
When you’re changing the oil pan, you’re also effectively getting an oil change. Take a drain pan, open up the sump and let the old oil flow out until it’s all gone. Be careful of the initial surge of oil that emerges when removing the drain plug.
Step 2: Remove Bolts
You should be able to see several bolts that mount the pan to the engine’s crankcase. If you can’t see them, check the transaxle because on some models the bolts are there, or even behind the exhaust manifold. You may have to remove another component first to get to the oil pan.
Step 3: Remove the Pan
With the bolts out of the way, you should not be able to wedge the pan out. You might use a flat-face tool to pry it off because it can be tricky sometimes.
Step 4: Clean the Surfaces
Next you’ll want to clean the top of the oil pan and the bottom of the crankcase using a good cleaning solvent. You also should use your chisel to remove any remaining gasket parts before fitting the new one in step 5.
Step 5: Fit the Gasket
With all old gasket residue now gone, you can go ahead and put in the new gasket. Secure it in place and try to keep it still and steady the whole time. Your new gasket has to fit snugly but also without breaking or being overstretched or overtaxed along the way.
Step 6: Fit the Oil Pan and Bolt in Place
Surfaces cleaned and gasket in place, you can now put your oil pan back in place, being careful to align it correctly.
Step 7: Replace Oil
Finally, you can put in new oil, and as you do be sure to check that there are no apparent leaks or seal problems. Take a look to see if any oil is seeping or dripping from the bottom.
Cost of Replacing Engine Oil Pan
Depending on how hard it is to access and also how expensive the particular part for your car, you can expect to pay between $100 and $400 for a professional replacement (parts and labor) but if you can do it yourself, then the pan will only cost between $35 and $135 or so, so you can save a lot that way.
Go Home